Showing posts with label gift. Show all posts

Friday, January 6, 2012

inspirational ---


i've posted about the coasters and trivets i've been stamping -- i love the look of the tumbled tiles, a rustic charm.

i've expanded the tile concept into magnets - i had a bunch of these in my etsy shop - and they have been moving very well.  each has a different inspirational quote (from various stamp sets from Stampin' Up)!

i love that no 2 of these will be the same - the cracks and holes and patches in the tile make each one unique.

these are easy enough to do --- the tiles i bought  a "sheet" of at lowe's, and unlike the coasters and trivets - these you can use whatever ink you like.  the coasters and trivets i use stazon because it doesn't run with the water and or heat placed on it.


you could also seal the tiles with modpodge if you wanted too since they don't need to be absorbent.  i just attached a heavy duty magnet to the back.

wouldn't these would make a great gift for a friend, or a party favor?


thanks for stopping by today!  hope to see you again soon!

happy stamping!


Monday, November 14, 2011

a time to be thankful. . .

it looks like the holiday season is upon us -- thanksgiving is just around the corner, and the christmas season will soon follow.

it seems i've started to think about chirstmas a little earlier than normal this year -- i hate that.  thanksgiving is my favorite holiday  --- but since i opened my etsy shop, and have started to do some craft shows, it seems i have to start thinking about the winter holidays sooner then i'd like.  sigh.

but -- first, here is a thanksgiving project.  this is a set of trivets.


they are stamped with stazon ink on 6 x 6 tumbled tiles.  i also add a bit of cork or felt to the back so it doesn't scratch up the table top.

i love the rustic feel of these - celebrating the harvest.

thanks for stopping by - i've been pretty busy making holiday items for some upcoming shows.  be sure to stop by again soon -- i'll be sharing some of the fun projects.

in the mean time -- have a wonderful thanksgiving!

Wednesday, October 19, 2011

glass pendants --

hey!  thanks for stopping by!

i have a fun project to share with you today!  i've seen them around alot, and i finally figured out how to make them --- glass pendants.  i sold a bunch of them over the weekend at the craft sale! 

these are just a few of the ones i did for the show -- sorry, the first one is a little blurry.


 i also added ball chains to them -- they are so fun!


what a great way to use up scrap papers, and a quick and easy way to make something to match an outfit!

i found a great website for buying the glass pieces, metal tags and chain : Sun and Moon Craft Kits

these would make a great gift!  so fun!  the possibilities are endless!

i'll be making more of these for my etsy shop!

thanks for stopping by!  happy stamping, and hope to see you soon!

Friday, October 7, 2011

post-it project --

as i've mentioned before -- i've been working on some stuff for an upcoming craft show.  here is one of the projects i'm working on ---

i made a bunch of these -- they are cute little clipboards for your post-it notes!  i stuck some magnets on the back so it can be attached to the fridge.

these are quick to make -- start off with a square chipboard coaster.  and cover it in designer paper -- i covered both sides, but i guess you could just cove the front if you wanted.  i also added a strip of card stock or designer paper to the binder clip to dress them up a bit.

these are just a few of the ones i made for the show -- thought i'd give you a bit of a sneak peek!

thanks for stopping by! 

happy stamping!

Monday, August 8, 2011

i've been featured!!!!

things have been a little quiet in the craft room lately -- i injured my back last week, and have been slowly healing.  but i'm on the road to recovery and should be back up and running again soon --

something exciting i want to share with you --- i received an email last week telling me i had been featured on a blog!  how cool is that --here is the blog:


Pixel Berry Pie Designs Blog


stop by and check it out!  she has lots of cool things featured, and if you are an etsy seller, you can add a link to your shop for some free advertising.

so -- here is the item she featured from my shop  - tumbled tile coasters.


have you ever stamped on tiles?  it takes a little practice, but it's alot of fun.  you want to use stazon ink - or if you need to use a marker, something like a sharpie.  it needs to be something permanent so as not to bleed when you use them -- yes, use them! :)

some people seal the coaster with an acrylic spray -- i don't like to do that.  i like them to be absorbent.  the image will stay for a long time - don't worry.

they are not dishwasher safe, but can be wiped with a damp cloth.

this set of 2 uses the SU set - because i care, and a stamp i picked up in michaels for the background.  i used timber brown, royal purple, and olive green stazon ink.

i also but some felt on the back of the tile so it doesn't scratch any surfaces.

thanks for stopping by!  happy stamping!

be sure to stop by the blog i listed above - lots of cool stuff to check out!

Sunday, July 31, 2011

quick and cute magnet

i know, i know --- this has been neglected again.  i'll try to be better! ;)

here is a cute -- and quick project for you today ---


i just made some of these to put in my etsy shop.  the other one is a cranberry color.


these are made with the SU stamp set simply said.  the papers are also from SU -- an older patern pack - pack 3 i believe.

once everything is stamped and put together i put it in a 2.5 x 3.5 acrylic frame - with a magnet on teh back.

i love this stamp set -- i use it alot.

this is such a sweet little gift for a friend!

thanks for stopping by!  happy stamping!

Tuesday, July 19, 2011

stamping on candles --

wow -- i really need to be better about posting things.  sorry about that ---

i have a fun project for you today -- stamping on candles!  and how to make your own rub-ons!

my husband paul works with HOBY (hugh o'brien youth) and he is traveling to chicago to take part in thier world leadershoip conference.  eachyear he takes a small gift to share with the other adult volunteers.  this years theme is "ignite your light" - so i came up with this cute idea -- stamped on a candle.  the candle is completely burnable.

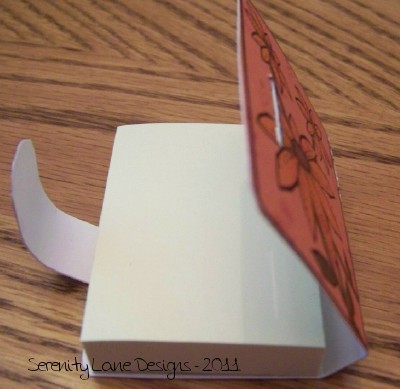
here are the pictures - directions will be below.


have you ever stamped on a candle?  if not, your in for a treat - it's easy!

what you'll need:

a candle - any size and color will do
tissue paper - to match the candle
stamps
markers
heat tool
oven mitt
old stockings/nylons

first stamp your design onto the tissue paper, use the markers to add color.  then you will want to trim around the design.  next, lay the design on the candle, and use the oven mitt to hold it in place - the heat tool will get pretty hot.  using the heat tool  - wave it over the image, be sure to get the edges - you will see the paper melt into the candle.  once it is all "melted" in, use the nylon stocking  to smooth over and buff the candle.

now --- i didn't have a stamp that i wanted to use for this project, so i created my own digi stamp, and created a rub-on.  i ran the digi stamp through the printer and printed it onto a transparency sheet (be sure if you are using words you print it out backwards).  be sure the ink doesn't dry too much, place it down on top of the paper (in this case tissue paper) and use a bone folder, or craft stick to rub it off -- like you would do for a rub on.  you can reuse the sheet -- just use a baby wipe to remove the leftover ink.

lots of fun things can be done ---

in the candles above i also used a little bit of stickles to add some sparkle to the candles -- it's hard to see in the photos.

hope you give it a try!

thanks for stopping by -- i'll post more soon! :)

happy stamping!

Monday, July 4, 2011

i'm back ;)

i haven't posted anything new in a while --so, i thought i'd fix that today.

first of all --- happy birthday america!  happy july4th!

i've been MIA for a bit because i'm getting ready to open an etsy shop - i actually hope to do that in the next week.  so -- be watching for news about that.  you can join my new facebook page by clicking the link in the sidebar.

anyway ----

i have a fun project for you today - a corner bookmark.  these are so handy and cute.

here is one i did the other day ---


here are some rough measurments so you can try your own.


after it is cut and folded - place double sided tape on the little tabs that stick don and bond together.  the one side slips over the book page.

in the one i made above - i covered white cardstock with DP to make it a little heavier.  stamped and cut out the dragonfly, and added some stickles for sparkle! 

cute and simple!

thanks for stopping by!  happy stamping!

Monday, June 13, 2011

perfect pocket post-its ---

i have a cute little project for you today ---

i bought this stamp when i was at the allentown show this spring -- you may remember the shirt and tote bag cards that i posted before - this is from the same stamp company  -- toomuchfun rubberstamps


i used it to make a cover for a small post-it note pad.  it's the perfect size for your purse or briefcase.

here is a picture of it all closed up --- sorry, i didn't realize how bad the picture looked until i posted it, but you get the general idea.

you can't tell from the picture, but it is stamped on  an orangish colored designer paper -backed by cardstock to make it heavier -- and it has a small floral print.

here are some more pictures of it - open.


i also used SU markers to color it in - old olive, summer sun, and close to cocoa.  the "edges" are scored to fold over the post-it note pad. and i used an x-acto knife to cut the slit for the tab.

thanks for stopping in!  hope to see you again soon!

happy stamping!

Wednesday, June 1, 2011

lipgloss project --

this is a quick little project i put together the other day, to tuck into a gift -- and had i had more time i would have decorated it more --- but it's cute, so i thought i'd share ;)


this cute little holder holds a round lipgloss / lip balm / chapstick.
the paper is SU - cameo pink.  the stamp set is SU - doodle this, as well as a black SU ink pad.  the black ribbon i had on hand.  i also used the double slot punch to punch holes for the ribbon.

here is what it looks like inside:


i used a piece of black cardstock to secure the lip gloss inside.

here are the measurements i used -- they are just to give you an idea.  this could easily be cute down and made smaller.  i also thought of playing with it to make it look like  a little purse.  (btw -- sorry for the - what looks like a hair on the picture below - i just noticed it -- hmmm.)


you can click on the image and it will open larger.

thanks for stopping by!  happy stamping!
Related Posts Plugin for WordPress, Blogger...